Table of Contents
What is the current version of my map?
Please select the main MMI menu to view your current map version.

Go to: Setup MMI

Navigate to Version Information by scrolling down.


Here, under the Nav. Database version, is the most recent version of your map.
My Audi’s current version as of 18 November 2020 is 6.33.1 (Europe!).
How can I prepare an SD CARD with the latest maps?
You will see something like this when you receive download links for maps from myAudi.org:

One by one, download!
When you have all the files, please only use 7zip to open the first one, 7z.001!

Additional files will automatically join!
How can I extract downloaded files? For a detailed guide on how to handle downloaded files, click here.
Put your SD CARD in FAT32 format.
Put a copy of your maps’ directory on the SD card (like picture below).
When you enter the created folder after unpacking the files with maps, you might see something similar to what is seen in the screenshot below.
Do not count the files, etc., because the file list may differ for the EU, USA, and Canada.
Now copy all of those files directly to the SDCARD, omitting any parent folders with names like 6.30.1 or 6.19.1.

Recommended SD CARDs for map updates:
- Sandisk
- Samsung EVO
Map updates for Europe and USA/Canada/Mexico require 64GB sdcard.. other regions can use 32GB SD.
How can I delete an outdated nav database?
Removing the previous map is an optional step. However, is strongly advised.
Benefits include
- Avoiding the error Fault Code 03175 – Invalid Data Set
- Don’t make mistakes when duplicating the map (out of size, slow write speed)
- The new map does not contain any files from the old map.
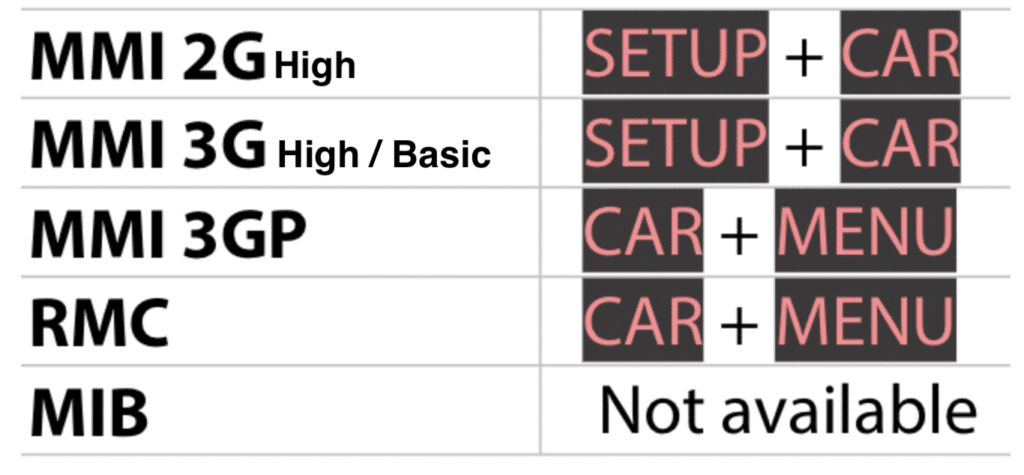
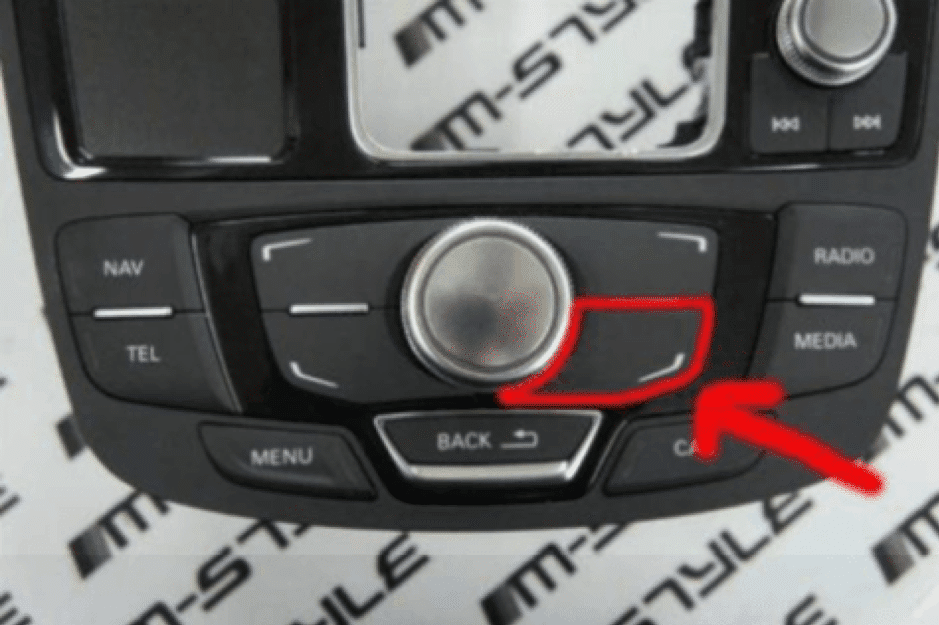
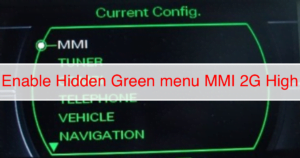
Green Menu, please (Press CAR and MENU and hold it)
You may find a tutorial on how to enable the hidden green menu here.
Please visit nav/databaseupdate.
Click it, then choose “Delete database (will need reboot).”

Hold off until the system deletes the info.

when it was done. Press the three buttons to restart your MMI.
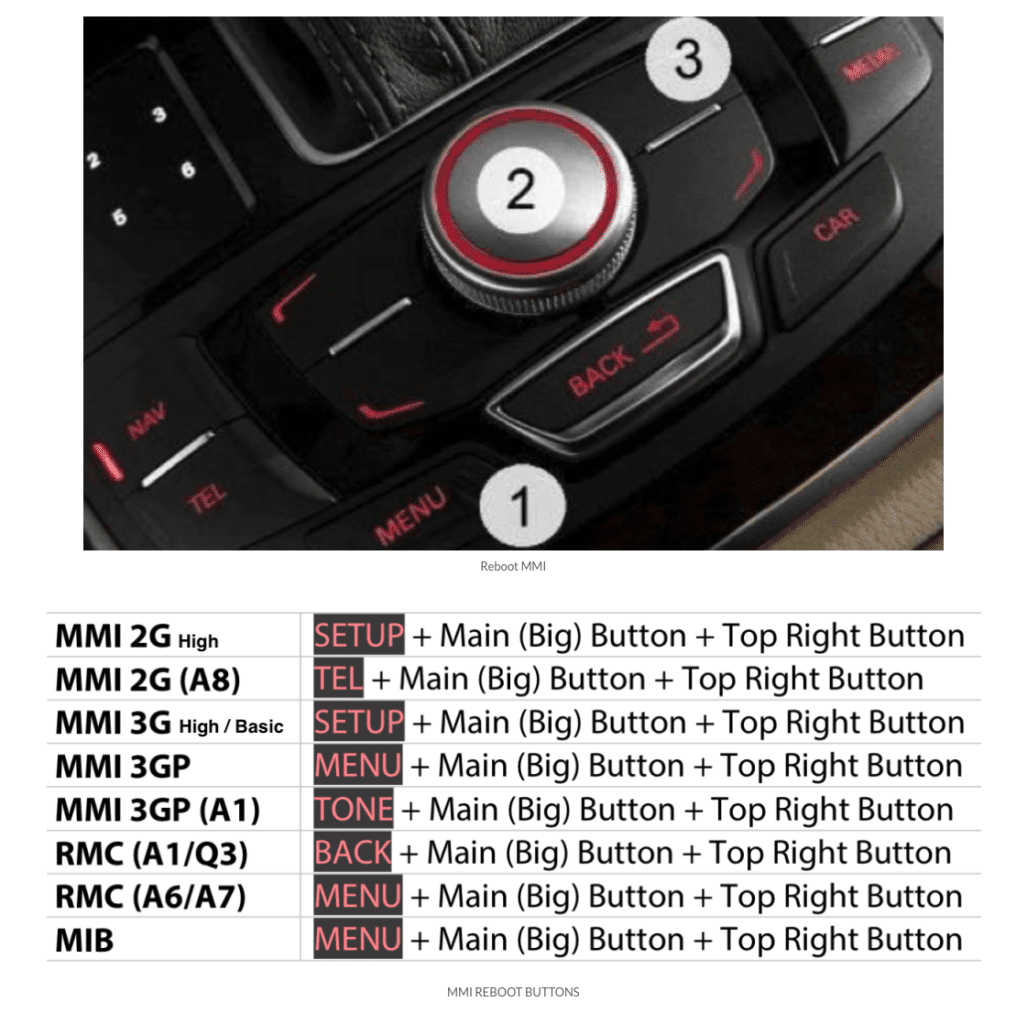
The MMI reboot in the Audi A8 is slightly different: huge button, upper right silver, and tone.
User Defined mode
Consequently, a “User defined mode” installation mode must be pushed,
You must access the green menu in order to enable this option; it is off by default.
GREEN MENU: Press and hold MENU + TEL or MENU + CAR or TONES + CAR, depending on the model.
** Then go to the SWDL section:


Map installation
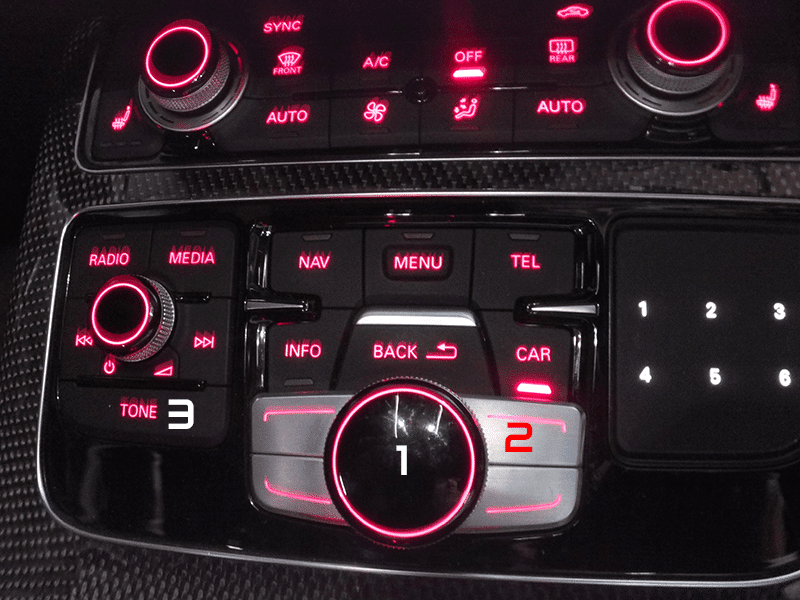
By hitting the CAR button followed by the BACK button, you can access the “Engineering Menu.” Hold the booth buttons down for a little while.
You’ll see the screen below.
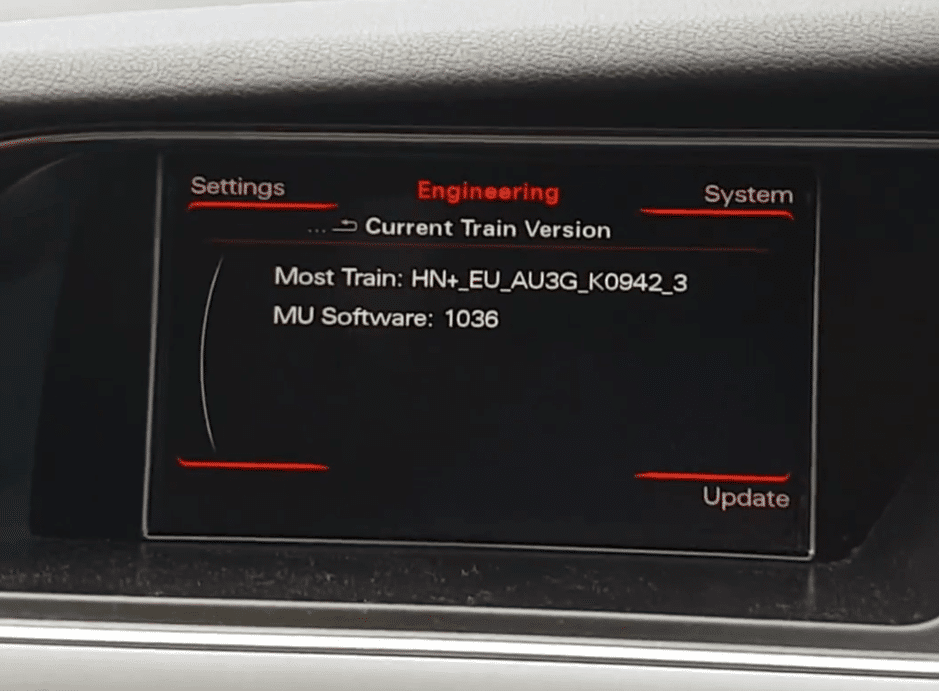
Place the SD card with the map in SD slot 1.
Using the MMI Control Panel, select “Update.”
Using the large knob, scroll down and choose the source from the menu (SD 1 in our case).

Press the large knob once to select the map.

Remember that we have enabled “User Defined,” so choose that option.

Go to the menu Audi MMi_3G_ECE Set the checkbox in each subfolder so that Y is shown in front of each subfoot.
- for US and other will be similar AUDI_MM3G_NAR.
- Australia & New Zealand AUDI_MMI3G_AN.
- South Africa Audi_MMO3G_SA.
- Rest Of World AUDI_MMI3G_ROW.
- Middle East AUDI_MMI3G_ME2.
- Europe AUDI_MMI3G_ECE
- Singapore AUDI_MMI3G_SN
Please also make sure that:
- Mapstyles,
- Navipersistence,
- TMCConfig (this might be N/A in USA/Canada/Mexico cars and do not worry if you can’t select this!)
are also selected to update.


Select the complete item manually in the MMI section AUDI MMI3G XXX (without the bootloader).
depending on the locale, XXX can be:
- ECE for Europe,
- ME2 for Middle East,
- NAR for USA / Canada & Mexico
- SA for South Africa
- SM for Singapore
- ROW for Rest of World

Please return and scroll to the bottom after that.
Press “Start” first, then “Start update.”


The map update will be finished in about an hour and thirty minutes; simply choose “Documentation Cancel/Abort Information” to restart the MMI.
The following overview screen shows the Device Summary screen.

“Continue” can be found by scrolling down.

You must click “Cancel documentation” because you are unable to connect to Audi SVM. The cause of ECU ERROR 03276 is this. Please see the 5F Information Electr Software Version Management page.
but don’t worry it won’t display any errors in dash or in mmi system.

How to activate my maps?
You risk bricking your device if you insert the SD before MMI has finished starting up.
A bricked (dead) MMI device will result from using the improper activator, therefore please double check that you’re using the right licensing for your firmware.
your SD card in FAT32 format.


Copy your license’s root file onto the clear SD card, making sure to format it with FAT32 first!
The license is contained in the license.zip file if you purchased our maps update.
After the last reboot, verify that MMI has started up completely!
(Press the RADIO, CAR, NAV, MEDIA, and TEL buttons all at once.)
Wait for a minute once every choice has been approved (there should be no alternatives in gray).
Maps and the most recent firmware must already be installed.
SD card should be inserted into the first MMI slot.
If everything has been completed as instructed after about 15 seconds, MMI will show you the next steps. Eject the SD CARD and try in the second slot if the first one doesn’t work.
It’s necessary to completely reboot your mmi after maps activation. (Please note that switching the ignition on and off will not restart MMI.)
Unless you perform a firmware update, in which case you might need to install license once more, you won’t need to install maps activation for feature map updates because it will already be stored in firmware memory.
Audi RSE – Rear Seat Entertainment – how to update?
The RSE (Rear Seat Entertainment) system in your Audi needs to be upgraded as well. The process is the same as it is for the main MMI unit; there are simply various button combinations.

You can then complete the remaining installation, which resembles that of the front MMI unit. Just be aware that there are several button combinations.

[…] After that, you can use our instruction to update your maps; click here to access it. […]