You can use this handbook to activate Apple CarPlay and Android Auto on Mib2 systems.
Supported platforms starting with the firmware:
- MHI2
- MHI2Q
Not supported:
- HN+ / HN+R / Hnav / Bnav (for those units we do have external Apple CarPlay / Android Auto boxes)
- MH2S / MHIG / MENT / MSTD
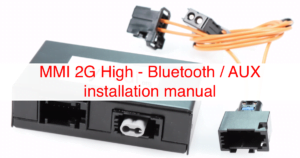
- MMI 2G High (we do have external box which enable Apple CarPlay / Android Auto)
- RMC
If you don’t know how to check, please visit this page (click)
Supported areas:
- Europe
- RoW
- USA
- Japan
- China
- Taiwan
Requirements
Two USB ports are required in the armrest/glovebox area of the vehicle. If your vehicle isn’t equipped, you must do so for CarPlay and Android Auto to function.
If your car has two USB ports, you can skip this.
- The two USB ports you can find here
- Remove central console (youtube tutorial how to do that)
- Taking off the back vents is not a philosophy. It pops up when we pry on it from the side.
- By removing a few screws from the console’s side and the cube, we can remove the glove box.

- Four screws are required to remove the left side of the console after removing the cover under the steering wheel.

- Take off the cover.

- The handle for opening the bonnet

- The sill cover can then be removed.

According to the attached directions, we run the cables. For the multimedia component, there will be two dice, and only one on the left. The pink one is optional since we want to have a backlight for the electric module, and T54c cube (smallest) pin 1 of the brown one is best captured at the ground point under the carpet under the removed sill cover. The red one is plugged into the fuse box in the side of the console (pins are numbered in cubes).
Software upgrade
Making a firmware upgrade is crucial since newer firmwares imply Apple CarPlay and Android Auto are more stable!
The supported firmware list can be found below. Make the right decision! Once more, if you are unsure of the firmware on your device, please consult this documentation (click).
Supported firmware versions
The script only supports certain firmware. You must upgrade first if you don’t have that firmware.
- MHI2Q_CN_AUG22_K1004_MU1003
- MHI2Q_CN_AUG22_P0915_MU0915
- MHI2Q_CN_AUG22_P1002_MU1002
- MHI2Q_ER_AUG22_P3638_MU0916
- MHI2Q_ER_AUG22_P3638_MU0917
- MHI2Q_ER_AUG22_P4170_MU1117
- MHI2Q_ER_AUG22_P4212_MU1177
- MHI2Q_ER_AUG22_P5092_MU1329
- MHI2Q_ER_AUG22_P5152_MU1329
- MHI2Q_JP_AUG22_P1017_MU1017
- MHI2Q_KR_AUG22_P1018_MU1018
- MHI2Q_US_AUG22_P4171_MU1118
- MHI2Q_US_AUG22_P4213_MU1178
- MHI2Q_US_AUG22_P4246_MU1320
- MHI2Q_US_AUG22_P5087_MU1316
- MHI2_CN_AU276_P1214_MU1214
- MHI2_CN_AU276_P1215_MU1215
- MHI2_CN_AU57x_K1006_MU1005
- MHI2_CN_AU57x_P0623_MU0623
- MHI2_CN_AU57x_S0037_1_MU0037
- MHI2_CN_AUG22_K0730_MU0729
- MHI2_CN_AUG22_P0618_MU0618
- MHI2_CN_AUG22_S0038_MU0038
- MHI2_CN_AUG22_S0039_MU0039
- MHI2_ER_AU276_P5088_MU1325
- MHI2_ER_AU276_P5502_MU1460
- MHI2_ER_AU276_P5506_MU1466
- MHI2_ER_AU276_P5509_MU1474
- MHI2_ER_AU276_P5510_MU1477
- MHI2_ER_AU276_P5515_MU1488
- MHI2_ER_AU37x_P3620_MU0875
- MHI2_ER_AU37x_P4159_MU1106
- MHI2_ER_AU37x_P4203_MU1168
- MHI2_ER_AU37x_P5089_MU1326
- MHI2_ER_AU37x_P5153_MU1326
- MHI2_ER_AU43x_P5098_MU1339
- MHI2_ER_AU43x_P5151_MU1339
- MHI2_ER_AU43x_P5404_MU1479
- MHI2_ER_AU43x_P5406_MU1489
- MHI2_ER_AU57x_K2589_MU1429
- MHI2_ER_AU57x_K3663_MU1425
- MHI2_ER_AU57x_P3236_MU0670
- MHI2_ER_AU57x_P3634_MU0910
- MHI2_ER_AU57x_S2519_MU0389
- MHI2_ER_AU62x_P5099_MU1340
- MHI2_ER_AUG22_K2161_MU1421
- MHI2_ER_AUG22_K3344_MU1438
- MHI2_ER_AUG22_K3346_MU1438
- MHI2_ER_AUG22_P3241_MU0678
- MHI2_ER_AUG22_S2148_MU0442
- MHI2_JP_AU43x_P0902_MU0902
- MHI2_JP_AU62x_P0701_MU0616
- MHI2_JP_AUG22_P0713_MU0713
- MHI2_KR_AU37x_P0901_MU0818
- MHI2_KR_AU57x_P0901_MU0615
- MHI2_KR_AU57x_S0035_MU0035
- MHI2_KR_AUG24_S0008_MU0008
- MHI2_TW_AU37x_P0901_MU0816
- MHI2_US_AU276_P5083_MU1312
- MHI2_US_AU37x_K5512_1_MU1484
- MHI2_US_AU37x_P5107_MU1363
- MHI2_US_AU43x_K1083_MU1412
- MHI2_US_AU43x_P5124_MU1389
- MHI2_US_AU43x_P5180_MU1462
- MHI2_US_AU57x_K3324_1_MU0925
- MHI2_US_AU57x_K3341_MU1426
- MHI2_US_AU62x_K2588_MU1407
- MHI2_US_AU62x_P5125_MU1390
- MHI2_US_AU62x_P5181_MU1463
- MHI2_US_AUG22_K3345_MU1439
- MHI2_US_AUG22_K3347_MU1439
Europe / Australia & New Zealand / Middle East / RoW / Singapore / South Africa
- MHI2_ER_AUG22_K3344
- MHI2Q_ER_AUG22_P5092
- MHI2_ER_AU57x_K3663 – this one have already included Apple CarPlay / Android auto!
USA / Canada
- MHI2_US_AUG22_K3347
- MHI2Q_US_AUG22_P5087
Set up SD with the script.
You must first obtain the script, which you can do by clicking here (click).
Once downloaded, please open the Mib2Patch.zip file.
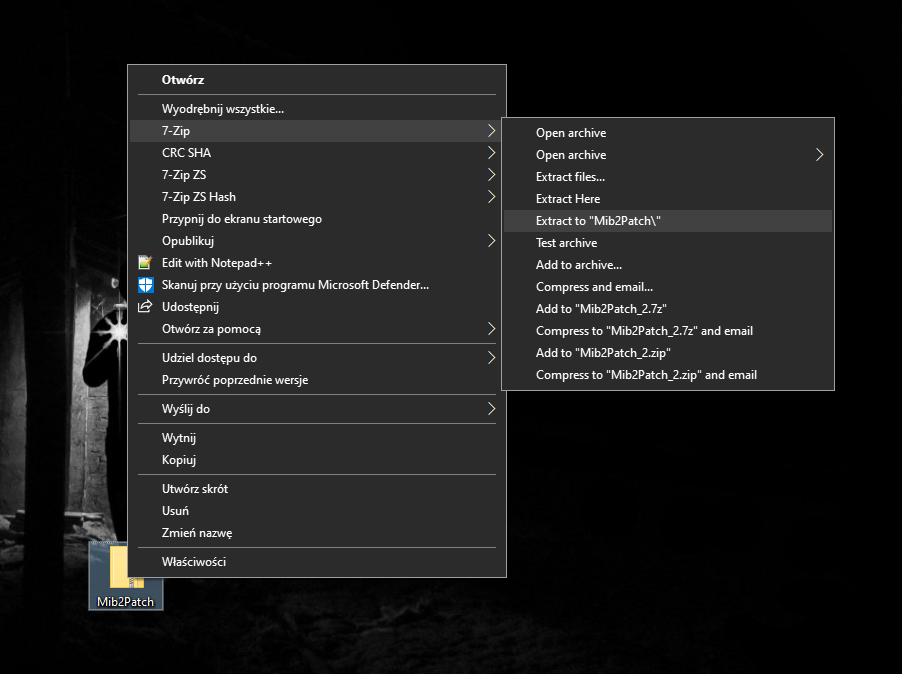
Prepare the SD CARD now.
I do advise using at least an 8GB SD card (script require smaller, but not every MMI want to read it).
Make sure your SD CARD is formatted as FAT32.
Go to the unpacked folder now to see a list similar to this:
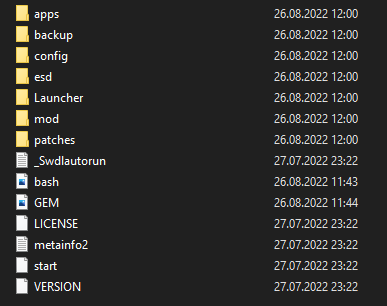
Copy all selected files directly to an SD CARD. Make sure that all of the aforementioned files are visible when you access your SD directly; they cannot be in any parent folders.
and can leap to the vehicle 🙂
How to set up the script
Start your automobile when you get in and let it run for five to ten minutes before getting in.
Insert an SD card into Slot 1; the script ought to launch automatically after 60 seconds.
The device will restart in SWDL mode for FW updates.
The device may momentarily inform you via a message on the screen that the system is either preparing for installation or is not (yet) ready for installation.
Simply wait for the reboot; this is usual.
⚠️ Do NOT remove SD card
The boot screen and several update-related windows will appear briefly before the screen goes black.
The entire process will about 5 to 10 minutes.
Basic unit backups will already have been made during M.I.B. installation.
You will see a summary of the installed packages once installation is complete, with Y(es) next to any completed packages (only Launcher in case of M.I.B install).
- Go back on that screen/exit the screen.
- The next Screen will present something like this: “Start diagnostic tester: Main unit/version…”.
- Press CANCEL
After installing M.I.B, you can see a Software Version Management Error (SVM) in 5F through OBD. Run this script’s “SVM fix” function to get rid of it.
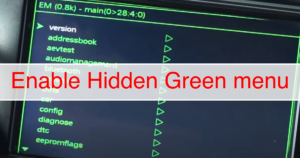
How to access the newly added hidden menu
You must enter GEM after M.I.B installation is complete and the device has booted.
Please be aware that GEM takes a while to become accessible following a cold boot of the device; this can take up to five minutes.
To enter GEM, use the key combinations that are appropriate for your unit.
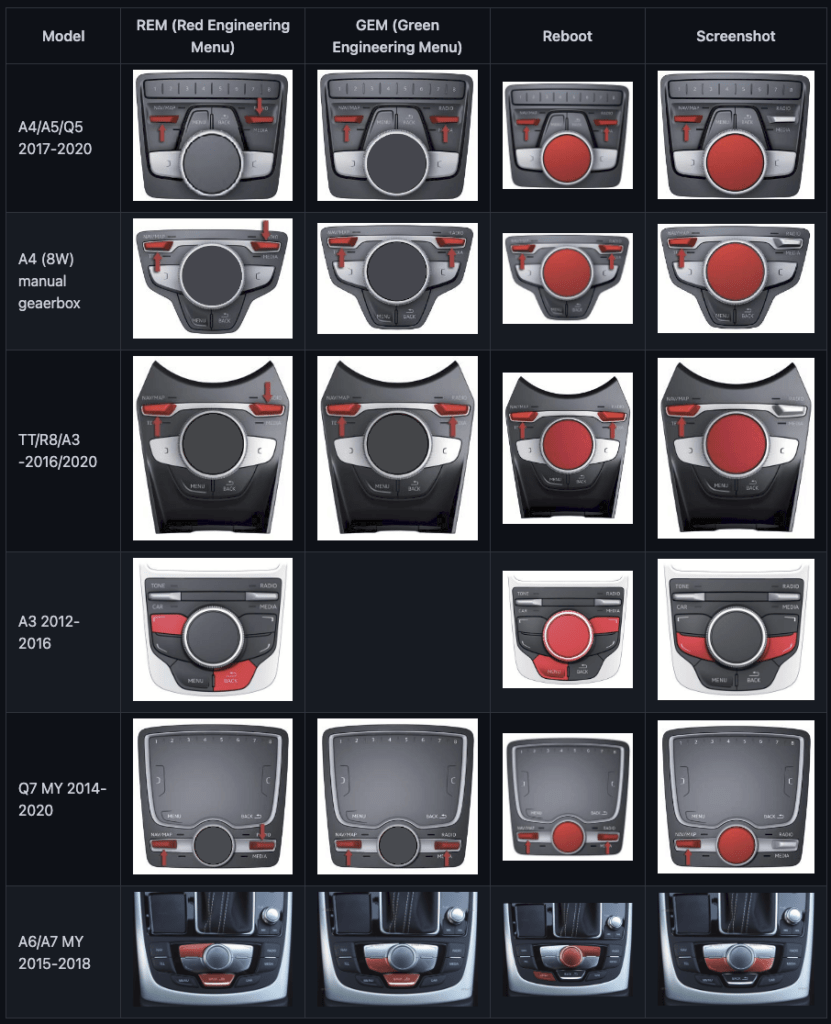
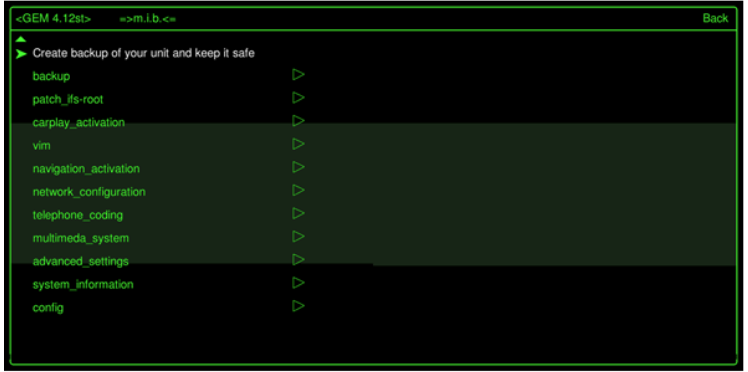
Enter “mib” on the following screen and make a backup first! Go to the backup tab and adhere to the directions.
Then IFS-root patch -> Flash patched image – the unit should reboot after completion, so we enter the green menu again – select M.I.B. and then Patch IFS-Root-AIO . Reboot the unit and the Android auto / Apple CarPlay should rock. The SD card can be removed.
Map update
The unit patch mentioned above removes the necessary FEC code, adding a lifetime map license to your unit.
We have updated maps for:
- Europe here
- ROW ( Argentina, Australia, Bahrain, Botswana, Brazil, Brunei, Chile, Indonesia, Israel, Jordan, Kuwait, Lesotho, Malaysia, Mexico, Mozambique, Namibia, New Zealand, Oman, Philippines, Qatar, Reunion, Saudi Arabia, Singapore, South Africa, Swaziland, Thailand, Turkey*, United Arab Emirates, *partially) here
Here is a link to a documentation on installing map updates (click)
Since Apple CarPlay and Android Auto require a wired connection, you must plug your phone into a USB port (hence, you must have two USB ports because only one of them will function).

[…] How is a script installed? Quite simple Please review this guide (click). […]